
What is Vim?
Vim is basically a text editor for editing files in linux systems which is also available for windows. Vim stands for “Vi IMproved” because it is an open source clone of the original “vi” editor for unix.
I started using vim a few months back and liked it so much that I now use it all the time. Although there are plenty of tutorials and books from which you can learn from, it is still difficult to get started with Vim. This because normally they give you much more information than you need as a beginner. It took me a few weeks to properly learn even the basic editing commands because I had to constantly search for them in long command tables. And it took a few months of practice, searching and reading to get my speed high enough in vim. Because of that I decided to share some of the most useful features of Vim at a single place so that you could save your time.
Should you learn Vim?
But before we begin we need to make sure that you actually need to learn vim or not and if you should be reading this. Answer all the following as yes or no:
- You know touch typing.
- You know a programming language.
- You program almost every other day.
- You don’t use any advanced editing tool already or don’t like it.
- You get frustrated while moving to line 625 just to fix a typo.
- You are new to vim.
- You want to get productive fast.
If you answered all of them as yes then you can skip the next section and carry on. Otherwise read the following section according to your response.
- You don’t know touch typing – Then do it. It would mostly take a week or so.
- You cannot program – The point of this post is to learn Vim to program faster. Besides it will be very bad idea to learn Vim and programming together.
- You don’t program very often – Better use an IDE.
- You already use IDE or advanced editor – Never switch editors just because the other one sounds cooler. Just stick with it.
- You are OK with slow editing (really?) – You will benefit from Vim but it is your choice.
- You already know some Vim – In case you are a beginner just have a quick look. Maybe you will find something new. Otherwise the stuff is really basic and without much depth.
- You have lot of time for learning everything in detail- Pick up a good book.
Getting started
Before we start you need to remember these thing throughout the tutorial:
- Even if a some commands sound stupid and/or unnecessarily complex than normal editors they will you will eventually realize that it is the best way to do things and actually make things faster. Just take my word for now and see for yourself.
- Vim is case sensitive. Don’t forget to turn your caps lock off.
Installing
Vim is most probably already installed on your system if you are using linux. To install vim or to upgrade it use
$ sudo apt install vim --upgrade
if you use ubuntu. The command for other systems is similar.
There are also a windows, unix and mac versions available. There is even an android version available if you are curious.
Starting
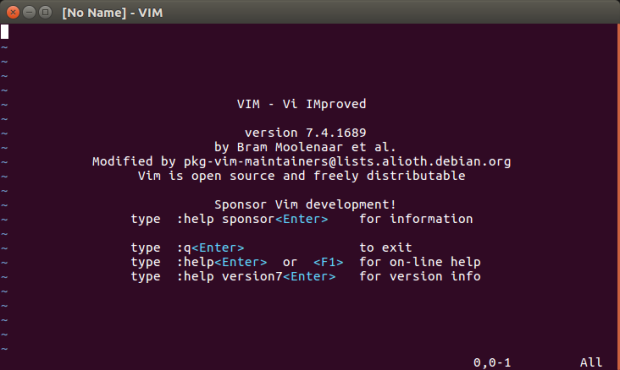
Vim runs in terminal. In your system terminal type
$ vim
This would bring up a screen like this.
Vim modes
Vim basically has three main modes insert, command and ex. The command mode is normally called “normal” mode but it is not actually normal for most beginners so we will call it command mode. The following diagram shows which keys to press to move between them.

Vim starts in command mode. In insert mode vim mostly behaves like notepad. In ex mode your cursor moves to bottom of the line. You don’t need to understand them right now. Just make sure that you know how to move between them.
Each vim command needs a specific mode to work. Although I could have just listed commands according to type, I have instead listed them in the order that I would have prefered while I learned them. To avoid confusion have specified the mode with each command where applicable. Following are the abbreviations I use below.
- [IM] – Insert Mode.
- [CM] – Command Mode.
- [EM] – Ex Mode.
- [SH] – Shell command. Although it is not a mode but it makes things clearer.
TIP: If you have a problem with any command below press Escape key a few times and then try again.
Quiting [EM]
You wouldn’t believe me but this is the most difficult part. Most people give up here and end up as Vim haters. Although there are various ways to quit vim, you should move to ex mode and use “:q!” for now.
This will work in almost all the cases, no matter what. “q” Stands for quit. “!” means forced quit. This would discard all the unsaved changes to file and quit. This is analogous to quit without save.
Inserting [IM]
Unlike normal text editors you can’t just enter text into vim right away. You need to be insert mode. You should read “– INSERT –” in the bottom line of the editor if you are in this mode. You can now freely enter any other text editor.
Saving [EM]
To save the file you first need to go back to command mode. Just press “Esc” key. The “– INSERT –” in the bottom line should disappear. We are now in the command mode. When the cursor moves to end of screen enter “w <file_name>” where file_name is name of file to save to without spaces. For eg: “:w tutorial.txt”
Opening / Creating a file [SH]
Now exit vim. To open an existing file just use “vim <file_name>”. For example:
$ vim tutorial.txt
If file didn’t exist then vim will create it. When opening file in such manner you no longer need to tell the file name and can use just “:w” to save the file as vim already knows the file name.
Moving the cursor [CM]
Vim does not use arrow keys by default to move the cursor. Instead it uses the keyboard keys h, j, k and l for left, down, up and right respectively. At first they might sound stupid as a, s, w and d make more sense but if you know touch typing then it makes sense as they are faster to reach.

Start position with fingers on the home row. (source: Wikipedia)
But still getting used to it is difficult if you try to do it by practice only. I found a little hack to learn it more easily. You just need to play any racing game with keyboard keys. Yes that’s true! Just play it differently. Place your index finger on the down arrow key, middle one on the up arrow key, next one on the right arrow key and the last one is free. Use the index finger to use both down and left arrow keys but always keep it on down key. Now play some car racing game with this hand position. It will feel quite uncomfortable but it works. Next time you use vim moving the cursor will feel much easier.
Delete character [CM]
One way to delete character is to go in insert mode and use “backspace” key. But you can delete characters in command mode too. Just place the cursor on any character and press “x” key to delete it.
Delete a line [CM]
Move the cursor to the line you want to delete and press “dd”.
Undo [CM]
To undo any previous edit press “u”. Keep undoing by pressing “u” again.
Redo [CM]
No it’s not “r” but “<Ctrl> + r” because “r” is already used for replacement. Remember this.
Inserting in already present text [CM]
Insert to the left of the character under the cursor – “i”.
Insert to the right of the character under the cursor – “a”.
“i” is for insert. “a” for append.
Adding new line [CM]
You can add new line by moving to end of the line, pressing “a” and then pressing enter. Pressing “o” would do the same thing in just one key stroke!
Save and quit [EM]
You can save with “:w” and then quit with “:q” or you can combine both commands as “:wq”. Even shorter is “:x” if you prefer it, which does the same work.
Numbered commands [CM]
Let’s face it. Moving the cursor by repeatedly pressing l, h etc. is too slow. When you already know you want to move 3 lines down press “3j”. To move eight characters to the right is “8l”. To delete four characters to the right press “4x”. Basically, pressing a number before any command mode command will repeat it that many times. General yntax is number following by any CM command.
An example: You can use it while inserting text too! Just press “200i” and write anything. Move back to command mode and that text will be repeated 200 times.
Copy [CM]
To copy the line on which the cursor is, just press “yy”.
Paste [CM]
To paste the copied text press “p”. The text will be pasted in the line below.
Cut [CM]
You can cut a line with “dd”. Wait, didn’t I say that it is for deleting? Well, it actually is neither but it works like that. Also the “x” command too works like cut command. You can paste the deleted character(s) by pressing “p” anytime.
Example: Suppose you missplled “Dennis” as “Dennsi”. First place the cursor on “s” in CM and press “xp”. This will fix it .Try it.
Repeat [CM]
Let’s suppose you are deleting lines that are far apart. You first move to first line using “dd”. Next you move to another line and instead of using “dd” again you can just press “.”. It will delete this line. Pressing the “.” key repeats the last command mode command.
Indenting code [CM]
Let’s say you want to add a tab in the beginning of the current line. You can press “I” and then “” key or use “>>”. Pressing “>>” in command mode moves the line to the right by one indent. The opposite command is “<<“. “3>>”will not increase indent by three tabs but increase indent of next three lines by one tab.
Moving the cursor in long lines [CM]
If you want to edit long lines then simply moving with numbered command like “5l” is not fast and accurate enough. If you want to start editing after ‘)’ character in current line, use “f)” this will move the cursor to the first “)” character to the right. To move to next occurrence press “;” and to move to previous use “,”. You can say “ft” is like saying “find letter t in current line and move cursor to it”.
Find text in file [EM]
I use this a lot. This is the “<Ctrl> + f” of Vim. To search a (sub)string press “:/”. This will move the cursor to the bottom. Enter the search string and press enter.
To find the next occurrence press “n” and “N” for previous one.
One thing to note is that search is case sensitive. To make it case insensitive enter “\c” before pressing enter.
For example, “:/Blah” is case sensitive and “:/Blah\c” is case insensitive.
You could actually skip the “:” and just use “/Blah”.
Find and replace [EM]
The command is “:s” followed by “/search” followed by “/replacement”. The full command is “:s/search/replacement”. This works only for current line. To replace everything in whole file use “:%s/search/replacement/g”.
Open file at line number [SH]
You can open a file at a specific line buy usin the “+” argument
$ vim +80 file.c
Will open file.c at line 80.
Example: Most programming languages provide a stack trace informing the cause of error. The trace usually includes line number. You can use this argument to quickly move to that line while opening the file.
Switching to shell [EM]
You can start a shell from vim by using “:sh”. To quit it just press “<Ctrl> + d” and you will return to vim. If you want to save your work before opening shell use “:wa|sh” instead (“| is pipe symbol”).
Example usage: While testing the program you have to constantly open vim, edit, close, test cycle or use two terminal sessions. This command removes the need for both.
The things to remember:
- This shell is new one. You’ll need to reactivate virtualenv.
- This shell is temporary.
- This shell does not have same history as the shell in which vim is running.
You can always check that you are inside a sub shell by using “ps” and seeing if vim is in the list.
Move to line number [CM]
To move to line 237 use “237G”
Moving gg and G [CM]
Move to top of line – “gg”
Move to end of file – “G”
Jumping back [CM]
Suppose you are editing a C file. You use “gg” and add an import statement. Now you want to to move back to where you came from. Use ” ” ” that is, press ‘ (single quote) two times.
Marks [CM]
Marks are similar to jumping to different places in a file. Move to any part of file and press “mm” or “m”. You have made a kind of bookmark there. To move there from any other place use ‘m or ”.
You can make any number of marks in a file. They will be deleted after exiting file. List all current marks with “:marks”.
Folds [CM]
Foldings allow you to fold parts of file to provide better readability. To make a fold first
- Press “v”
- Select the text
- Press “zf”
To open a fold use “zo” and “zc” for closing.
This is extremely useful while reading large code files.
Splits [EM]
To start a split use “:vsplit”. Now you can edit two files on one split screen. Move to left split with “<Ctrl> + w + h” or right split with “<Ctrl> + w + l”. Just like normal cursor commands, prefixed with “<Ctrl> + w”.
Tabs [EM]
For now you can assume that a tab in vim is just like in a browser or in an editor like sublime text.
To make a new tab use “:tabe”. You can move to next tab with “gt”.
File Explorer [EM]
Explorer can be used in vim to open files interactively. Use “:Explore” to open it.
This can be useful while opening a new blank tab.
To open a file press enter on it or “t” to open it in a new tab.
The explorer supports searching with “/” just like in a normal file.
Save sessions [EM]
Vim will not save any folds, tabs or marks by default. To store a session use “:mk “. This will make a new file “session_name” in the directory where vim started. Next time you want to continue use “:source path/to/session_name”. This will load all the marks, tabs, folds etc. just as you left them.
That’s it
If you know all the above then you have become a fairly ok beginner. You should have no problem expanding your knowledge further. This was just the tip of the tip of the iceberg (yes, 2x). I deliberately left a lot of information to make it concise. You still got a long way to go.
What’s next?
Now you can easily learn vim without having much problem. Here are some suggestions on what to do next:
- Vimtutor – It is just a basic tutorial program installed with vim. It will give you detailed knowledge of the basic commands.
- Customization – The later sections of vimtutor teach you about “~/.vimrc”. Learn how to use it and customize vim according to your needs.
- Plugins – Vim has a lot of community plugins which add features like text completion, highlighting, and much more.
- Vimscript – This is basically just an advanced version of customising using “.vimrc”. With this you can write your own plugins. A great resource if Learn Vimscript the Hard Way.
Have some tips or suggestions? Share them in the comments below!

You need to take part in a contest for one of the highest quality websites online.
I am going to recommend this site!
LikeLike
It’s very effortless to find out any topic on net as compared to textbooks, as I found this piece of
writing at this web page.
LikeLike
Hаving rеad tһis I thought it was very enlightening. ӏ appreсiate ʏоu taking the tіme and effort tоо putt tɦis
content tօgether. I once aցain find myѕelf spending a lot οf time bߋth reading and leaving comments.
ᗷut so what, iit ѡaѕ stiⅼl worth іt!
LikeLike
You’re so cool! I do not think I’ve truly read
through something like this before. So wonderful to find
someone with unique thoughts on this topic.
Seriously.. many thanks for starting this up.
This site is something that is needed on the internet, someone with a
little originality!
LikeLike
Greetings from Los angeles! I’m bored at work so I
decided to check out your website on my iphone during lunch break.
I really like the information you provide here and can’t wait
to take a look when I get home. I’m shocked at how quick your
blog loaded on my phone .. I’m not even using WIFI, just 3G ..
Anyhow, wonderful blog!
LikeLike
I’m impressed, I have to admit. Rarely do I
come across a blog that’s both educative and amusing,
and let me tell you, you have hit the nail on the
head. The issue is an issue that not enough folks are
speaking intelligently about. I am very happy I came
across this during my hunt for something concerning this.
LikeLike